


How to Add a Date that Auto-Updates in a Document
Last Updated on March 20, 2023 by Administrator
Have you ever wondered how to place a date on a Microsoft Word document so that it automatically updates itself to the current date each time you save? Well if you haven’t you should be using this feature!
Uses of a Date that Automatically Updates Itself in A Document
You can place this date element or object on your letterhead document, so each time you type out a letter on it you don’t need to worry about the current date, it would already be there! You can also place it on your CV or Résumé, so the holder knows when it was last updated, or place it on an invoice/receipt template document so that anytime you save an invoice or receipt, the date would always be current.
There are more uses for this. Tell us in the comments below how you have been using or intend to use this feature, after we explain the process.
Steps to Add a Date & Time to a Document
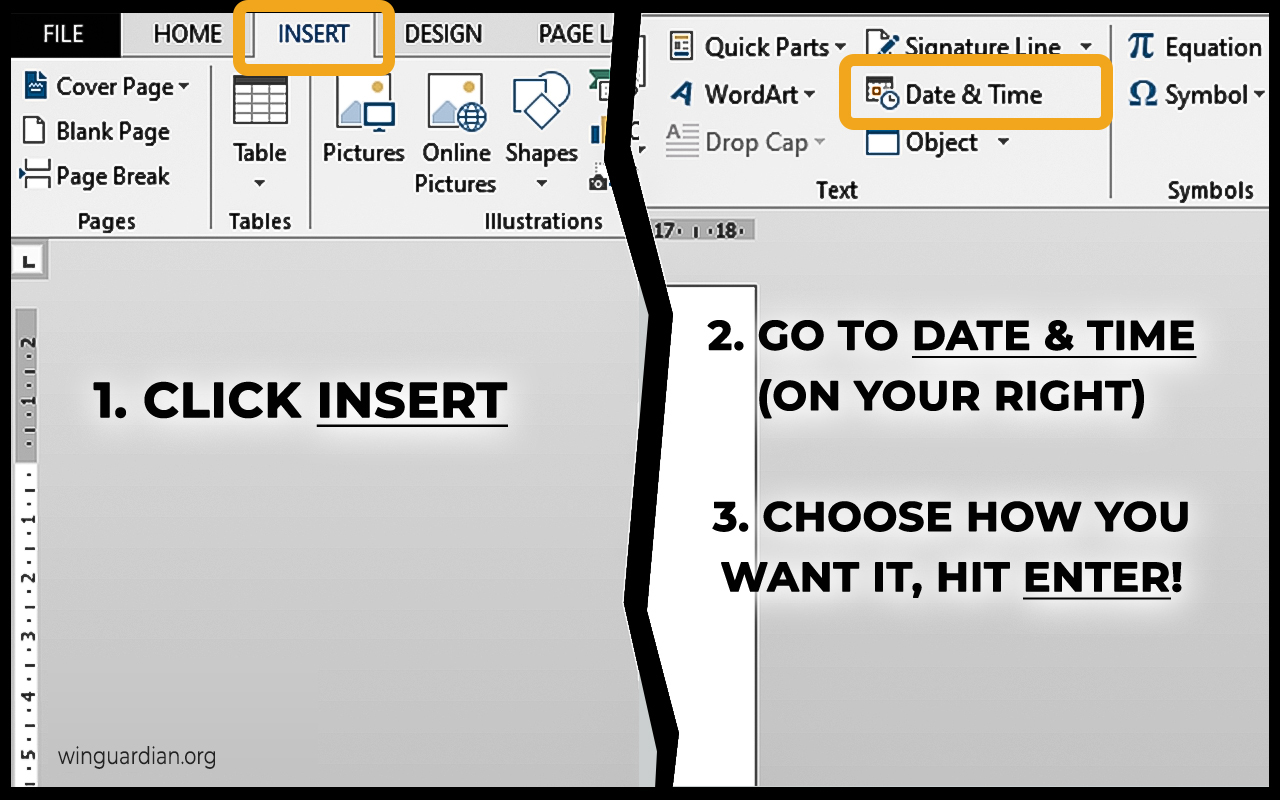
Adding a date to a Microsoft Word document
- Go to the INSERT tab in Microsoft Word
- You’ll see the Date & Time button to your right side or at the “Text” section of that tab
- Select the Available formats for how you want the date to appear
- Check the Update automatically box so the date updates anytime you save the document
- Click OK to insert the new date wherever you left the cursor
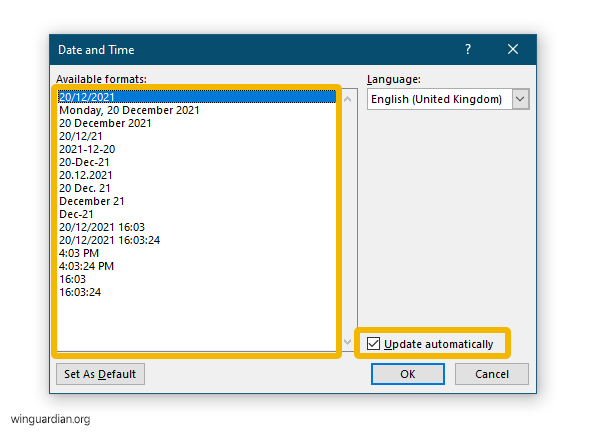
Choosing a display format for your date in Microsoft Word
That’s it! You have a new and quick way to add the current date automatically to your documents.
Choosing a Custom Date & Time Format Different from the Available Formats
There are times when you may need the date in a format that is not in the list of available formats.
For example, if you have a copyright notice in your document in the format “© 2023 Winguardian Ltd.” and you want the year to always be the year in which you last saved the document, you might want only the year in the date element that you add. To do that simply
- Insert a date, as explained above, in any format having the year the way you want it. For e.g. the previous format says 20/12/2021 and we want our year to be in the same four-digit format so we can choose that
- Right-click on the text part of the date after it is inserted
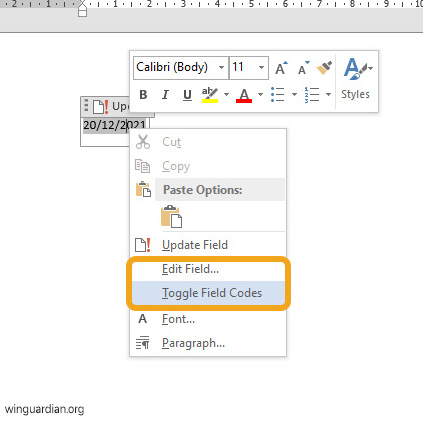
The context menu after right-click clicking a date object
- In the context menu that appears, there are two opotions you can choose from; “Edit Field…” or “Toggle Field Codes”
- Edit Field is an easier approach:
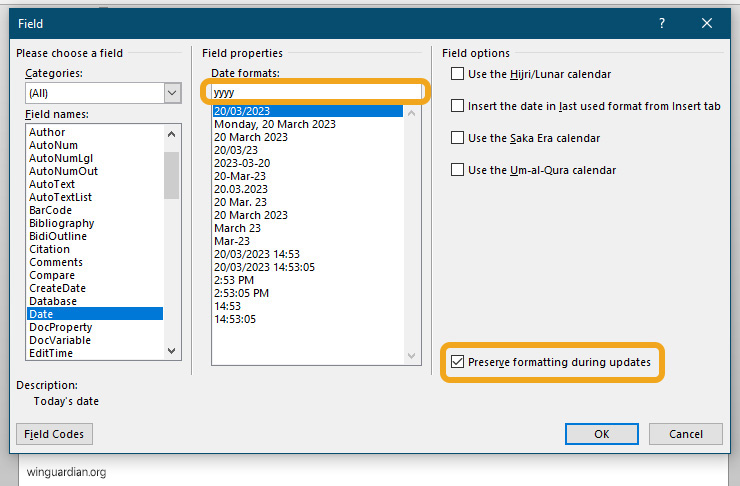
The “Field” dialogue box after choosing to “Edit [a date] Field”
- It opens a dialogue box
- At the middle part of the dialogue box it says “Date formats” with a box underneath that allows you to type
- The format of the date is written there, using certain codes
- The “yyyy” part stands for the year. Simply delete everything else. i.e. delete “dd/MM/” or type out your own format
- Check the bottom part of the dialogue box that says “Preserve formatting during updates”
- Click okay
- Toggle Field Codes is a faster approach:
- It shows you text in the form {Date\@ “dd/MM/yyyy”}
- The part in double quotes is the format of date, using certain codes.
- The “yyyy” part stands for the year. Simply delete everything else in the quotes. i.e. delete “dd/MM/”
- Then click “Update” above the text
- Edit Field is an easier approach:
See a full list of Date/Time Format codes here to help you create any format of date and time you would like.